Starting Your Own Sourdough Culture and Making Your Own Sourdough Bread
This post includes 5 Full Recipes from my book (Recipes For Reciprocity). Today we learn to harness “wild” yeast to naturally leaven bread.
This recipe is the entry point for a whole realm of flavors, culinary possibilities and healthier eating choices. The benefits of naturally leavened bread go far beyond being able to create delicious baked goods with their own flavor profile that is unique to the region you sourced the flour from. Sourdough starters which are created through wild fermentation include a diverse spectrum of naturally occurring (wild) yeasts and lactobacilli which means that your sourdough starter will have the ability to “pre-digest” the wheat flour for your body enabling more nutritional uptake. This stuff is on a whole other level from store-bought (one strain) factory packaged yeasts.
In ancient times grain farmers and bakers alike used to soak (in order to sprout) the grains before milling them into flour to help dissolve this protective casing and render inert the “anti-nutrients” which have given modern bread its “bad name” for making people gain weight, slowing down brain function, and causing a host of digestive issues. Modern industrialized bread making grinds up the protective casing of the wheat seed along with the germ (nutritionally dense core) meaning the part of that plant that is intended by nature to “fight” being digested is now being absorbed by the body.
It is also worth noting that most modern (non-organic) industrial wheat farmers (in the US and Canada) still spray copious amounts of Glyphosate on their wheat prior to harvest. They do that whether the wheat is genetically modified or not, so making sure the wheat, rye or other type of flour that you use is organic is important.
While sourcing out sprouted grain flour can be difficult and expensive, making your own sourdough starter (with organically grown wheat, rye or amaranth flour) is neither and can achieve the similar beneficial effects for helping with what your body is able to get out of wheat and other grains. When you use a home made sourdough starter to ferment your bread (or other baked cooked goods) you unleash a resilient army of micro-warriors that go about seeking out and dissolving those “anti-nutrients” and turning them into bio-available nutrients like omega-6. So when you make stuff with your sourdough starter you aren’t just making delicious baked goods, your using ancient knowledge to make those baked goods far more healthful than anything you buy in the stores today.

Tools You Need to Make a Sourdough Starter:
Glass container: Yeasts and bacteria make react to metal (I like to use a quart mason jar)
Wood/plastic scraper or spoon
Cheesecloth or a coffee filter: Use to cover your starter and keep out any bugs.
Rubber band
Measuring cups (not metal)
Ingredients:
- ½ cup of organic flour (Wheat, Rye or Amaranth flour for a gluten free option)
- ½ cup of filtered water (or good spring water)
- Time and tlc
Directions:
Combine flour and water in medium sized mixing bowl or 1L glass jar. Mix vigorously to incorporate air (in this case you are encouraging an aerobic fermentation, so that the naturally present yeast can find a symbiotic balance with the lactobacilli, which for the first week requires regular manual aeration/ oxidation) Cover your container with a clean dishcloth or paper towel and fasten with a rubber band to keep out unwanted critters. Place your container out of direct sunlight in a room temperature space 16-29C (65-85F).
Visit your sourdough a few times daily at first if possible, using a whisk or form to vigorously mix up the flour and water to aerate and encourage the formation of a healthy sourdough starter. Once every 24 hours for the first three days feed your sourdough starter by adding another half cup of both flour and water, mixing vigorously before replacing your towel on top.
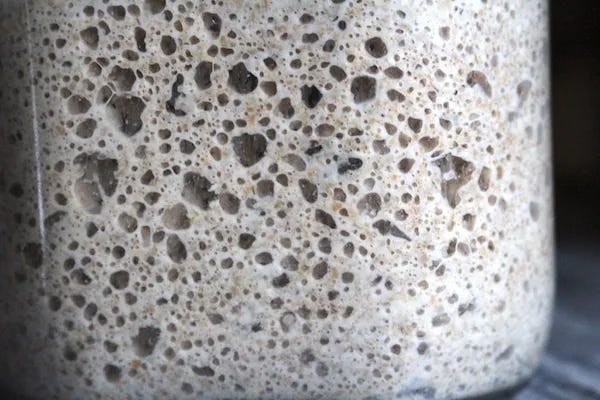
After about day three you should start to see sights of CO-2 production from your new lactobacilli friends (visibly noticeable by seeing little bubbles forming). For days four through seven, you will need to begin discarding half of the sourdough starter before each feeding. Though I will share several recipes that use up this daily “discarded starter” to make delicious and nutritious meals, since it is unlikely that your sourdough culture (“starter”) has achieved a nice balance between lactic acid bacteria and yeast yet (during days 4 to 7) I would suggest waiting until day seven to try cooking with it, and for the first 3 discards just adding it to the compost bin.

During this first week your starter can range from smelling mildly sour to really gross as there is still a battle going on between our “good bacteria” friends the lactobacilli and the other bacteria are not helpful to your sourdough starter, either is fine, do not be alarmed, just forge ahead. If however after day seven your sourdough starter has colorful mold on it and/or smells disgusting (think rotting vegetable matter) then it means its time to chuck it and try again, this seldom happens but since we are working with variable native bacteria/yeast populations with this “wild fermentation” process the odd off batch does happen. If this happens, don’t be discouraged, it probably wasn’t anything you did (or didn’t do) more likely was due to unforeseeable imbalances in the microbial community present in/on the wheat.
You can successfully grow a sourdough culture using just water and flour, but you can make it easier if you start with a slightly acidic solution to help ensure the right bacteria colonize the starter initially. Once a sourdough culture is established, it will produce acid in the starter to inhibit other bacteria. For the first few days as the sourdough starter is getting established, the culture is vulnerable to colonization by both good sourdough bacteria as well as spoilage bacteria.
Adding a tiny bit of lemon juice or citric acid at the start is one solution, as it acidifies the culture during the most vulnerable initial stage.
Peter Reinhart’s book, Whole Grain Breads, describes a technique known as “the pineapple solution” which suggests using a mixture of pineapple juice and flour for the first two feedings as you’re developing a seed culture.
The pineapple juice has a bit of fructose which helps feed the microbes, but it’s also acidic so it helps prevent contamination from leuconostoic bacteria which can spoil a sourdough starter. Any sourdough starter can be made with water in place of pineapple juice in a pinch, the pineapple juice just increases your odds of success.
After day seven the sourdough starter should start to increase significantly in volume after each feeding and should have a pleasant sour aroma. At this stage, you can (and should!) begin baking with it. For recipe ideas to use up the extra starter produced each day check out the recipes below in this post and others in my book for more ideas.
And if you want even more recipe ideas here are 100+ Sourdough Recipes ~ Bread, Biscuits, Cakes, Cookies & More!
You can start using your sourdough starter once it is consistently active and bubbly, indicating that the wild yeast and bacteria are thriving and ready for baking. This typically takes about 7-10 days of regular feedings and maintaining the starter at room temperature or until it consistently doubles in size within a few hours after feeding. You can also choose which method you’d like to use to store it depending on how often you plan on using your starter (on the counter or in the refrigerator).

*side note: Gluten and other substances that cause digestive issues (aka “anti-nutrients”) come from the protective casing of the wheat grain that is intended to allow the grain (wheat seed) to pass through an animal’s digestive tract intact without being digested so that it accomplishes its goal of reproducing in a new location. Longer fermenting times combined with a natural sourdough starter help dissolve those anti-nutrients.
Reminder: If daily maintenance is not compatible with your schedule there is the option of doing weekly feedings by storing your starter in the fridge instead of at room temperature. The downside is that the true sourdough flavor, texture and health benefits are achieved through a genetically diverse culture (community of lactic acid bacteria and wild yeasts) being present and each offering their own unique and subtle flavors and ability to pre-digest as well as leaven your bread. This diverse group of organisms have a symbiotic relationship with each other. That symbiosis was able to be achieved because you provided that community of micro-organisms stable living conditions to adapt to, depend on, and become specifically tailored to thrive in. If you drastically shift those living conditions by putting your starter in a fridge it is likely that part of the spectrum of native strains of lactic acid bacteria and yeasts present will be stressed out and may not survive. The starter will almost certainly stay alive and usable as a whole, but the flavor of the bread it produces and its ability to leaven (rise) that bread may be somewhat compromised. That said, if you wish to do a weekly maintenance schedule rather than daily, just be sure to take your starter out of the fridge and allow it to sit at room temperature for at least 16 hours (preferably 24) before cooking with it and before each feeding.
Reviving Your Sourdough After it’s Been Stored in the Refrigerator
Here are the steps I use to wake up my starter when circumstances force me to store it in the fridge:
Take the starter out of the fridge and let it sit at room temperature for 1-2 hours to reactivate and come to room temperature.
Once the starter is at room temperature, discard a portion of it. This helps maintain a manageable quantity and ensures a fresh start.
Feed the remaining starter by adding equal parts of flour and water (e.g., 1/2C each) to the starter. Stir well to incorporate.
Allow the starter to sit at room temperature for a few hours or until it becomes bubbly and active.
Measure the required amount of starter needed for your recipe, keeping in mind that you need to reserve some to maintain your starter.
After using the required amount, feed the remaining starter as before (equal parts of flour and water) and let it sit at room temperature for a few hours.
Once the starter becomes active and bubbly again, you can return it to the fridge for future use.
By following these steps, you can effectively use your refrigerated sourdough starter while ensuring its continued relative health and vitality.
Homemade Sour Dough Bread
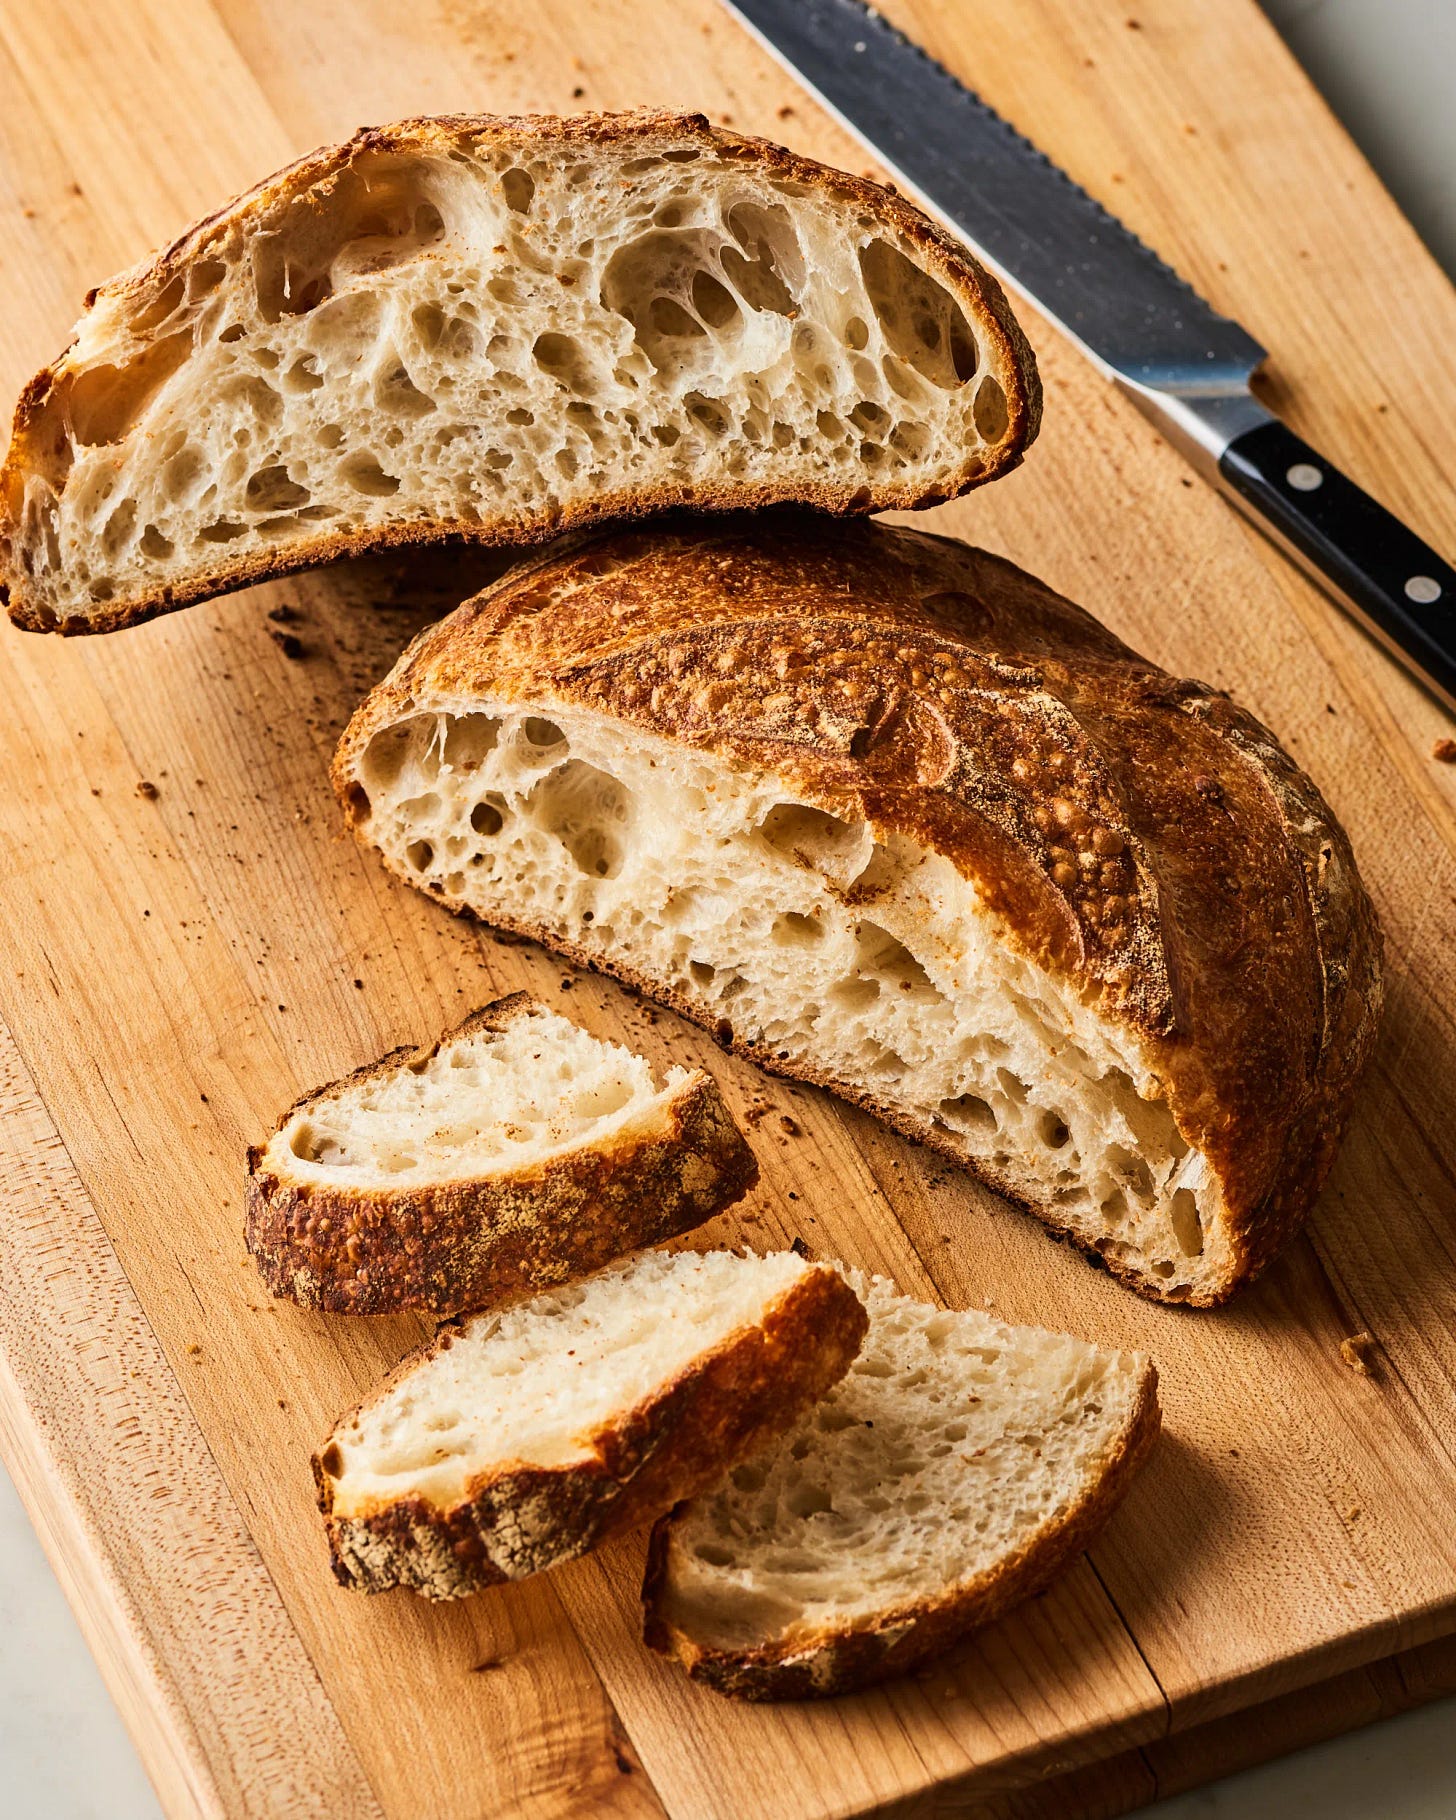
Give San Fransisco a run for it's money! Make your own delicious sourdough loaf with this simple recipe. Using a "homegrown sourdough starter" to ferment and naturally leaven the dough for this bread gives it a distinct tang and flavor profile that will be imbued with unique characteristics (texture, flavor, aroma) depending on where the wheat was grown that you are using. This is made possible because each region hosts its own strains of native lactobaccili and yeast populations which you will have propagated in your starter, and then used to ferment your dough. And you thought the term "Terrior" was only for wine snobs, nope... welcome to the world of local regionally defined artesian baked goods.
Ingredients:
- 5 1/2 cups organic flour (I prefer homegrown Amaranth or locally sourced organic sprouted Rye flour myself)
- 2 1/2 tsp. sea salt
- 1 cup sourdough starter
- 1 1/2 cups water
- 3 tbsp. honey
- 3 tbsp. softened butter (or coconut oil)
Directions:
Combine flour and salt in a large mixing bowl. Make a well in the middle of the flour and add the starter, water, honey and softened butter (or coconut oil). Mix all ingredients well with a wooden spoon until a rough dough begin to come together.
Knead the dough in the bowl for a couple of minutes. It will be shaggy and sticky at this stage. Let the dough rest for 5 minutes. Return to the dough and knead it for 3 minutes. Let the dough rest for 2 more minutes and then give it a final 1 - 2 minute knead (or until smooth and soft.) Cover the bowl tightly and allow to ferment for 8-12 hours (or over night).
When ready to bake, uncover the bread and grease a large baking pan. Divine the dough in half and shape it into round or elongated shape. Place on greased baking sheet (leaving a couple of inches between the loaves). Sprinkle surface of the loaves with flour and cover with plastic wrap or a damp towel to allow it to rise. Leave for 1 - 2 hours or until risen by 50 -75 % in volume.
During the last 30 minutes of rise time, preheat the oven to 400. Once the oven is hot and the dough has risen substantially, uncover. Give the dough a few slashes with a sharp knife. Place loaves in the hot oven and bake for 35-40 minutes or until the bottom sounds hollow when tapped and the internal temperature has reached 190F (88C). Move to a cooling rack and allow to cool for at least 20 minutes before serving. Will keep in an airtight container for up to a week. Freezes well.
Personally, I love to have a thick slice of homemade sourdough bread to dip in soups like this:
Thai Roasted Sweet Potato, Carrot and Ginger Soup
One of our favorite ways to enjoy several of our best producing crops (ginger, carrots, cilantro, sweet potato and chili peppers) is Thai Sweet Potato Soup. Typically, around mid winter we use the last of our stored carrots, sweet potatoes, ginger (and many other ingredients) to make a huge batch of this super nutritious, warming, delicious and inviting…
and also to dip thick slices of sourdough bread in Pumpkin Soup (for more on that read this) :
Stacking Functions With Pumpkins
This time of year in the temperate regions of Turtle Island many of our communities will be overflowing with cheap pumpkins of all colors, shapes and sizes due to the impending processed sugar intake frenzy at the end of the month.
Side note: Teff, buckwheat, sorghum, rice, amaranth and millet are all gluten free grains that can be used to make a gluten free sourdough starter.
Teff is a lovely grain from Africa that is used to make Ethiopian sourdough Flatbread called Injera, though I have also made Injera with Amaranth and Rye flour with great results. For more info and full recipes that involve Injera check out:
An Ethiopian Feast
I want to express my gratitude to all my generous substack subscribers and so I will be sharing another sneak peak from my soon to be publ…
And for those that received Amaranth seeds with your copy of my book and you want to incorporate some of your harvests in the form of bread, here is a recipe for Amaranth Sourdough Bread: https://breadtopia.com/einkorn-and-amaranth-sourdough-bread-revisited/
For those looking to make a gluten free sourdough starter, here is a recipe that includes 100% Amaranth flour as an option:
https://angelaswildkitchen.com/2018/04/16/make-your-own-gluten-free-sourdough-starter/
Other recipes for creating with your Sourdough Starter from my book:
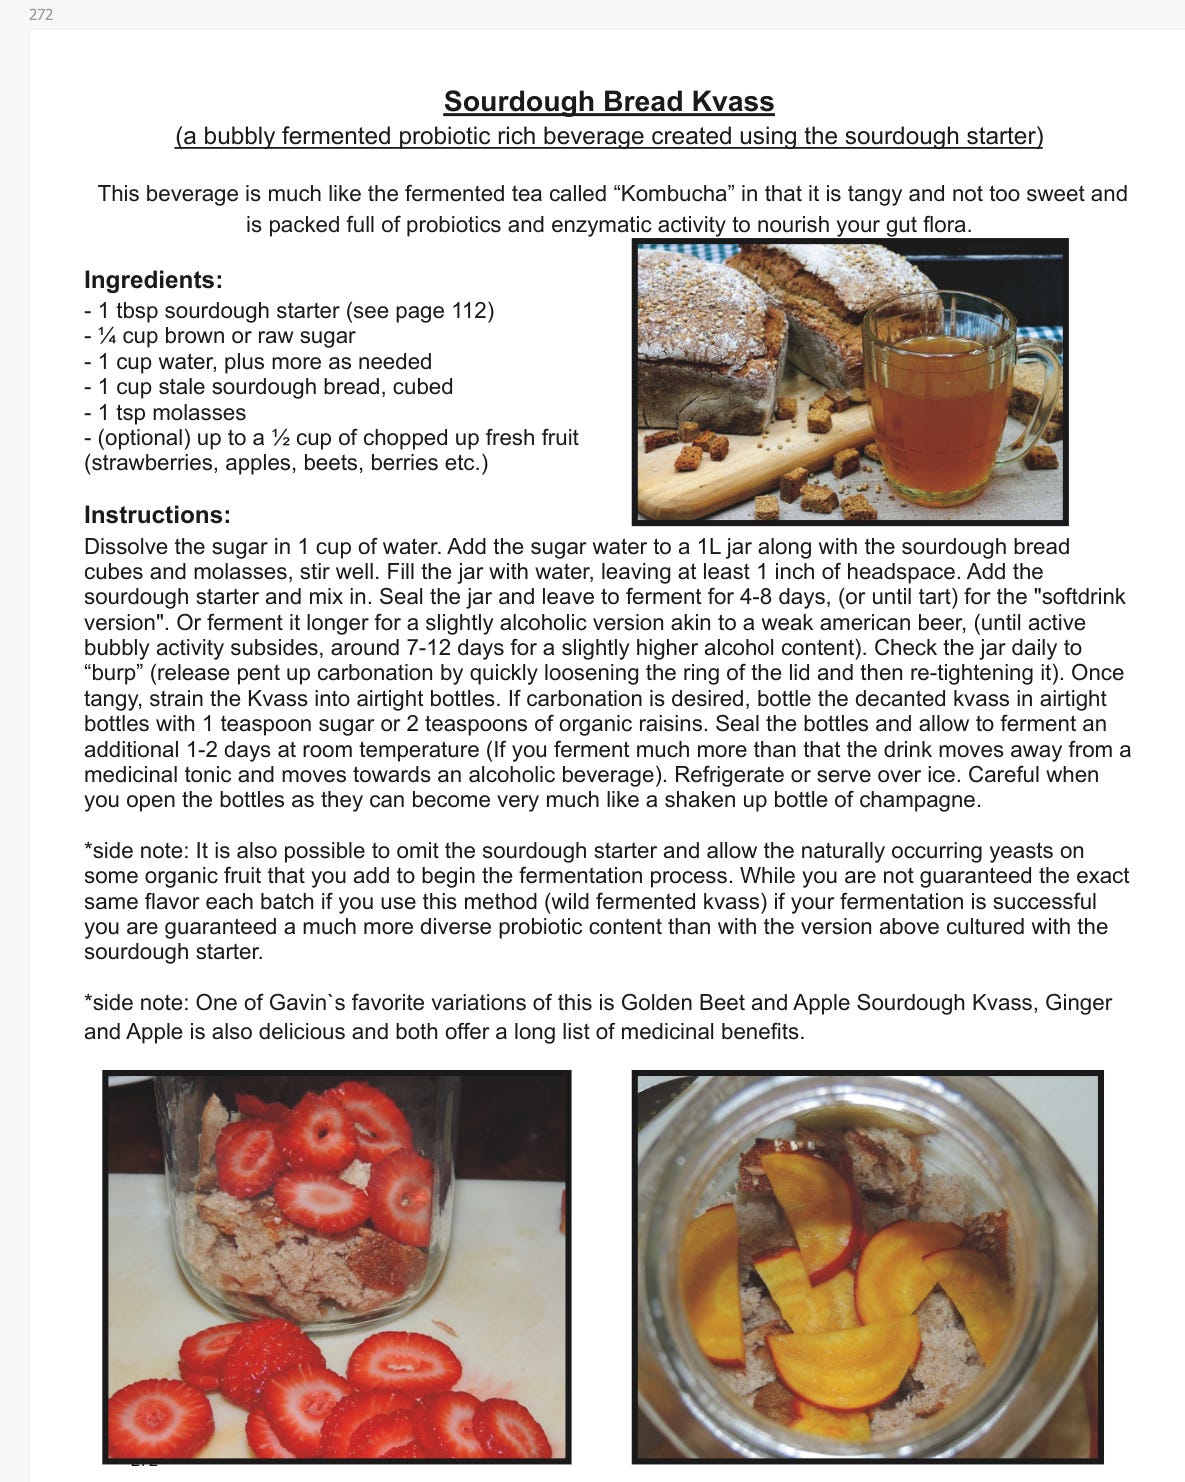
For more info on Kvass, it’s history, how to make it and it’s health benefits:
https://practicalselfreliance.com/kvass-recipe/
Some of the recipes above are enhanced versions of recipes from my book (cover shown in image below).
If you would like to have access to well over a hundred other fun and nutritious recipes like this there is info to where you can purchase either a physical or digital copy of my book below.

For those interested in purchasing a physical copy of the book you can do so through this link:
https://recipesforreciprocity.com/shop/softcover/


I am going to try again. I have tried many times to grow an active culture and my attempts have been thwarted.
I have done lots of wild captures, and the variation is surprising, so hold on to a strain you like.